Edge Break: Measuring Chamfer and edge radii
Introducing 4D InSpec’s Edge Break application
As an optional expansion for 4D InSpec owners, we are offering Edge-Break as a new application in the 4D InSpec software.
The Edge Break optional analysis package provides analysis of Chamfer, Rounded Edges, and Radius of Curvature as part of its results.
The analysis package reports the critical calculations of edge break radius or chamfer angle (depending on the need), and the angle of arc between the adjoining surfaces. It also reports the dimensions of the key geometric elements in the measurement’s field of view. Using 3D data, the results are not dependent on part orientation and results are obtained across hundreds of thousands of points along the feture, mproving accuracy and repeatability versus 2D techniques.

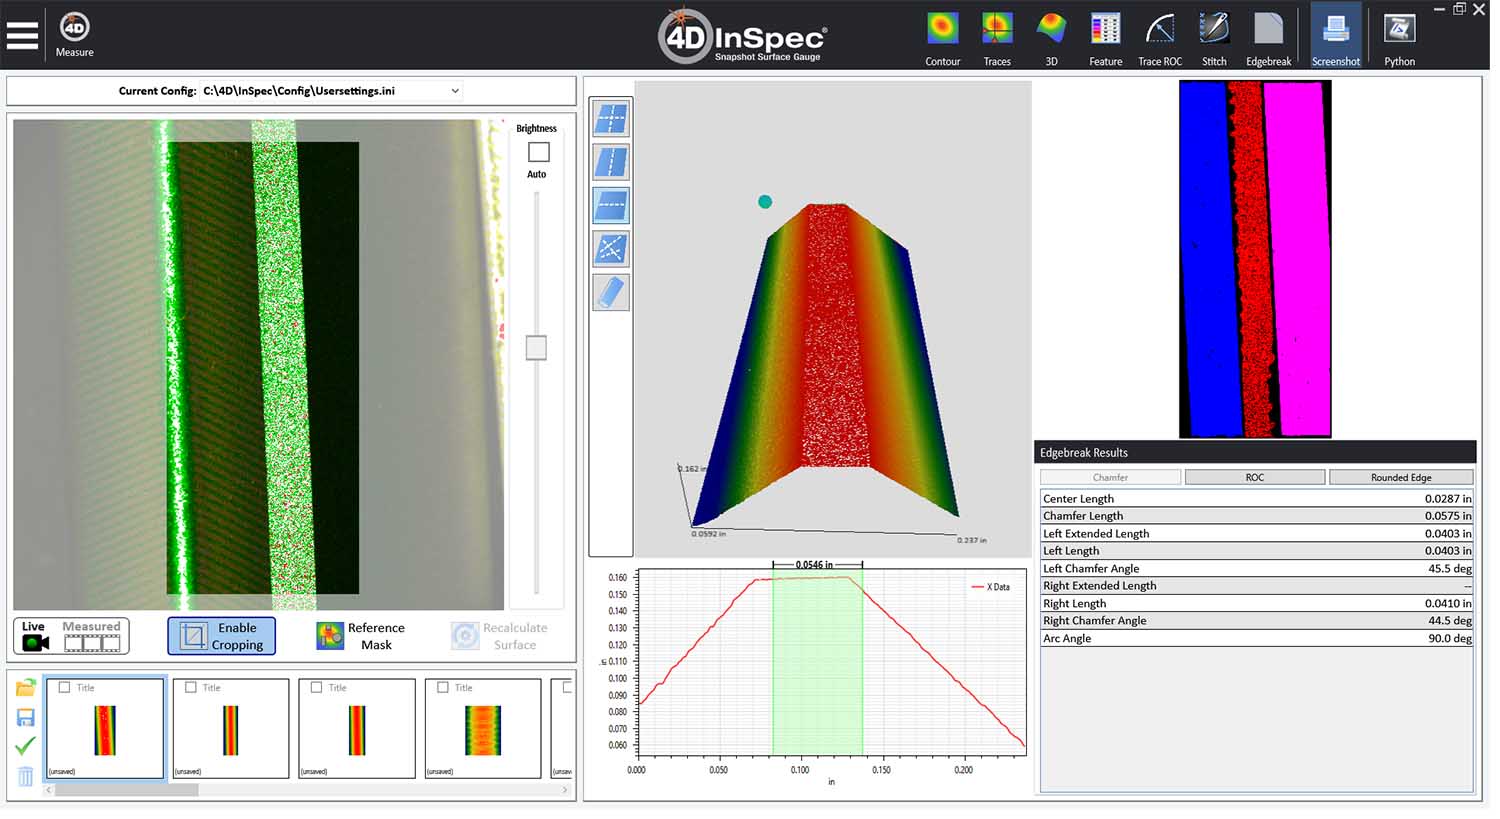
The Edge Break analysis package measuring a Chamfer.
Testing of our software against measurement standards shows a very high precision, and the measurement itself—remarkably—takes only moments.
For convenience in holding the 4D InSpec at an angle and with proper focal distance—reducing the need for fixturing parts for easy imaging—we do recommend the locking flexible arm accessory. For high-speed, repetitive, production measurements, we recommend the robot arm package.
The edge break analysis package works with both standard 4D InSpec and 4D InSpec XL. Which system you’ll need for measuring your parts will depend on the depth of field, stand-off and size of the edge break. Check with our applications engineers for a recommendation.
The Edge Break analysis option can be retrofitted in the field to your already-purchased 4D InSpec (or 4D InSpec XL), or purchased with a new system.

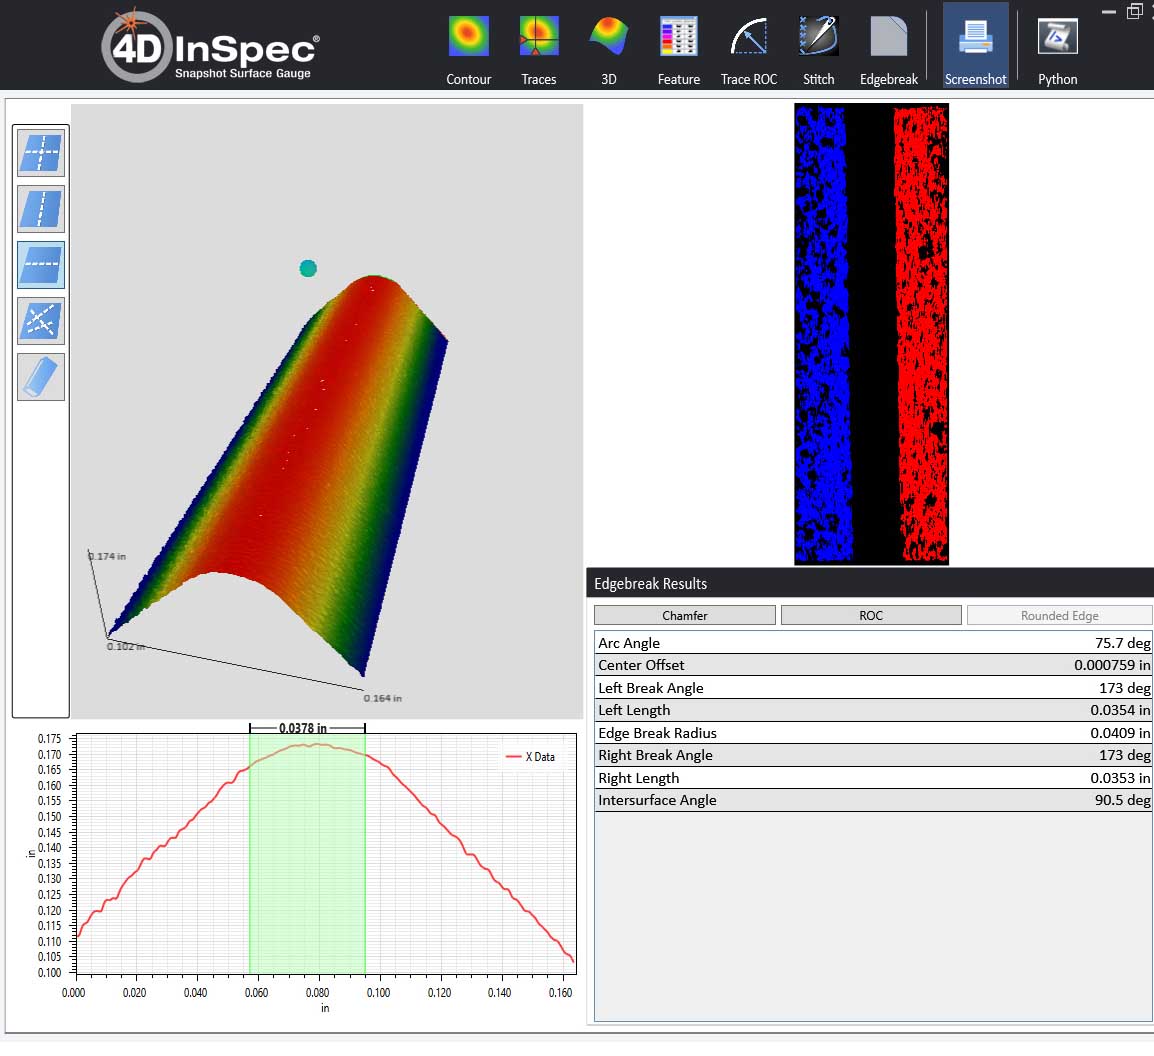
Screen Shot of Edge Break Analysis, presenting the results from measuring the radius of a 0.04 inch rounded edge. The measured radius is 0.0409 inches, with a 90.5° intersurface angle. The analysis can handle both inside or outside joins, that is, positive or negative radii.
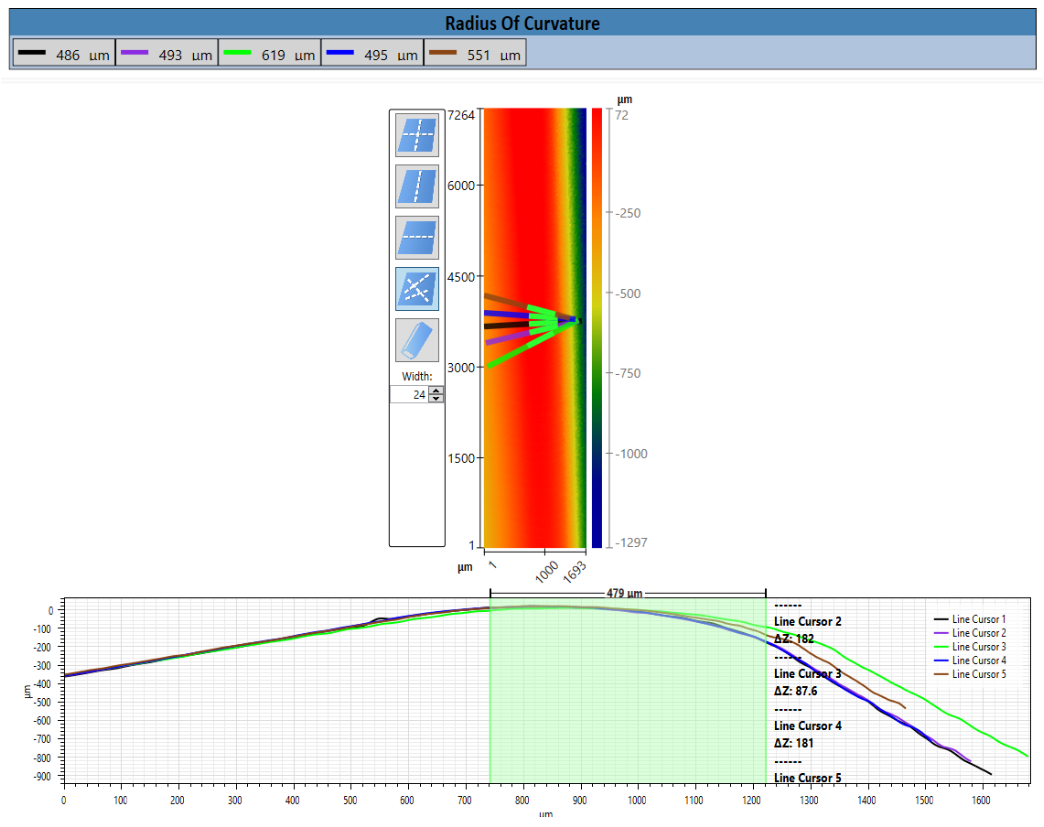
Why things go wrong: In this measurement of a curved radius edge, we drew several profile traces at different angles, demonstrating how traces that aren’t perpendicular will report the incorrect radius of curvature—demonstrating the hazard of relying on a 2D measurement.
Get In Touch
(520) 294-5600
Location
3280 E Hemisphere Loop, Ste 146
Tucson, AZ 85706
4Dinfo@ontoinnovation.com
Office Hours (Arizona Time)
Mon: 8am - 5pm
Tue: 8am - 5pm
Wed: 8am - 5pm
Thur: 8am - 5pm
Fri: 8am - 5pm
Sat: Closed
Sun: Closed


